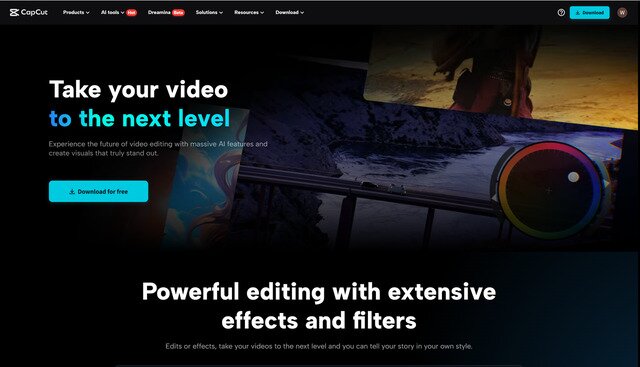
Do you own a beauty business, sell a product, or create products that you're trying to convince viewers to become buyers? With a good product demo, you can do this.
Clean video and easy editing can demonstrate how your product works and why they should care. That's where the CapCut Desktop video editor can assist you.
It provides you with ways to make your videos appear tidy and professionally crafted. With the proper demo, individuals can understand the worth of your product in a matter of seconds. In this blog, you will discover how to use CapCut PC to create excellent product demos that convert.
Note: Certain features require a paid plan.
Why Use CapCut Desktop for Product Demo Videos
The CapCut Desktop video editor is an intelligent option for creating product demos that are clean and sharp. It provides you with more control compared to mobile applications. You can easily control layers, timing, and effects.
Powerful images make individuals believe what they perceive. A smooth demo can demonstrate your product working and assist buyers in making easier decisions.
The features within CapCut PC assist you with that. You can screen records, insert voice-overs, utilise pre-made templates, and overlay text or images on your clips.
There's even a feature like text to speech that allows you to insert a voice into your video without recording your own. Most of the features are free, but features such as fancy transitions, special effects, or cloud storage require a paid account.
Even then, it's cheaper than paying someone to do it for you.
Key Features That Make High-Converting Demos
Dynamic Text & Callouts
Using the CapCut Desktop video editor, you can overlay clear text and callouts on your demo. They lead your viewer's eye to the most crucial bits. Labels, arrows, or brief notes clarify what your product does. This keeps attention to where it's meant to be.
Screen Recording & Import Options
If you're demonstrating a software tool or application, screen recording is important. With CapCut PC, you can record your screen and import it directly into the editor. You can also import other clips or pictures. This is convenient to illustrate how your product functions.
Voiceovers & Background Music
Audio keeps people engaged. You can add voiceovers or background music that is appropriate for your brand. This brings it down to earth and makes people trust you.
Smooth Transitions & Effects
You can seamlessly switch between clips. Some transitions are free. Some require a paid plan. Either way, clean edits make the demo smooth. You can even experiment with the AI video generator to create clips in no time. It's ideal for time-saving and communicating ideas clearly. This keeps viewers engaged and aids in converting views to sales.
Steps to Create a Product Demo with CapCut Desktop
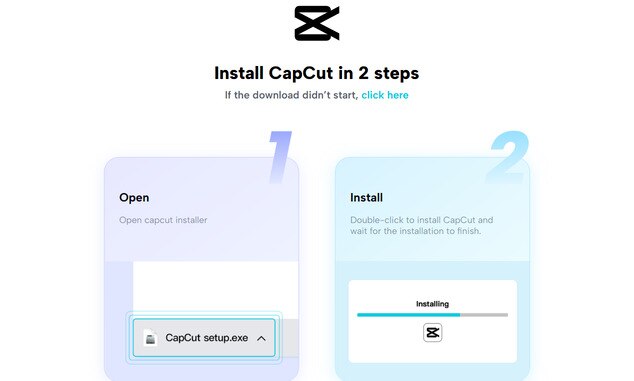
Step 1: Download & Install CapCut PC
To begin, download the CapCut desktop video editor from its official website. It supports both Windows and Mac. When installation is finished, launch the editor and create an account that's free.
This gives you access to basic tools. Certain features will remain locked unless you switch to a paid plan.
Step 2: Import Your Footage
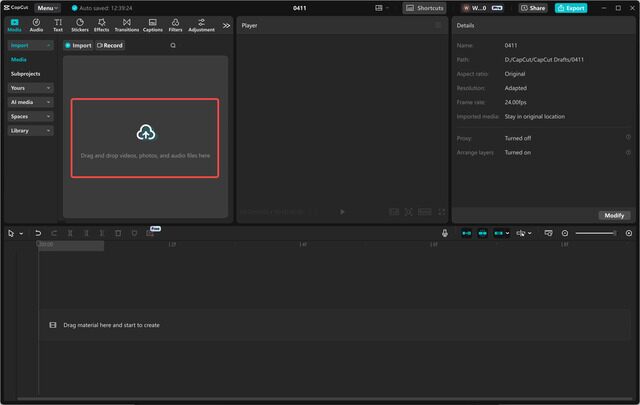
Start by tapping the "Import" button on CapCut Desktop to import your product shots or screen recording.
Once imported, drag and drop your footage onto the timeline located at the bottom part of the editor's interface. Here is where all the edits will be done.
Step 3: Add Background Music and Voiceover
Then, enrich your demo with music or a voiceover. Go to the "Audio" tab to open CapCut's internal music collection or upload a file of your own.
To add narration, utilise the "Voiceover" tool to either record your voice within the software or import a pre-recorded file. Voice and music assist in retaining viewers and expressing your message.
![capcut add music background] capcut add music background](/assets/blog/beauty-product-demo-with-capcut/capcut-music-background.jpg)
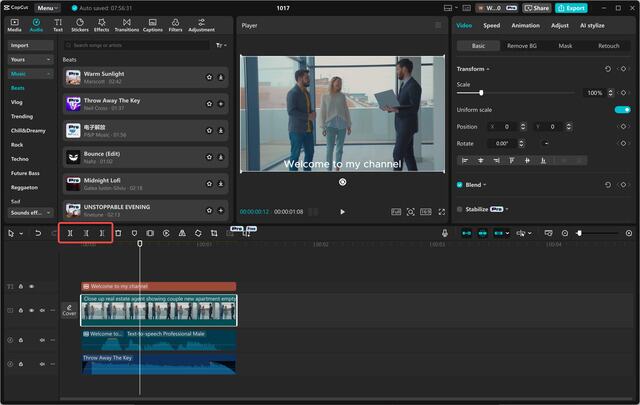
Step 4: Trim, Split, and Rearrange Clips
CapCut offers easy editing tools to trim, split, and reorder your clips. Use the “Split” tool (represented by the scissor icon) on the timeline to remove unwanted sections of the video.
Rearranging clips is simple; just drag them to adjust their position. This helps maintain a smooth flow and clear structure.
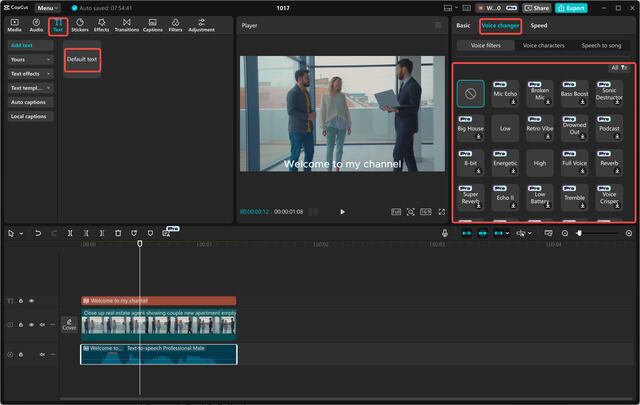
Step 5: Add Text and Apply Voice Effects
To lead viewers, insert clear call-to-action text such as "Buy Now" or "See More" from the "Text" tab.
You may also use the "Voice Changer" function under the "Audio" tab to modify the voice tone and make it consistent with your brand style.
Step 6: Export & Publish
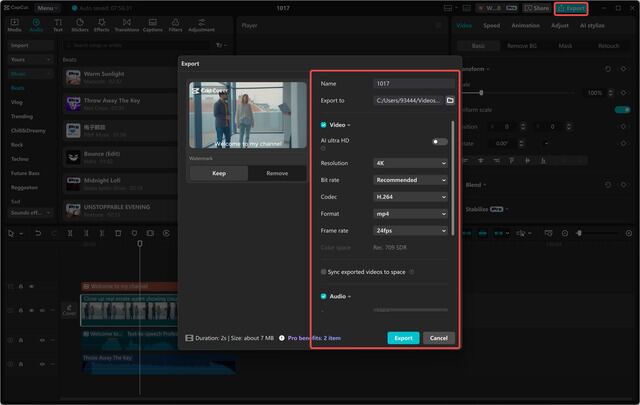
When you finish, review the settings. Select the optimal resolution, frame rate, and aspect ratio for your platform. Export the video in high quality.
You can publish your demo on your site, social media, or via email. There's no watermark, not even in the free version. But if you need to store or share videos in the cloud, you'll have to pay for the premium plan.
Conclusion
CapCut Desktop video editor is an excellent business tool for beauty professionals to drive conversions. You can use it to feature your products, emphasize their most important features, and make a professional impression without having to hire a video team.
Although some of the advanced features are only accessible with a premium subscription, the free version includes all you need to start.
So why not try it out? Make your first demo and experience the difference that expert editing can bring. Download CapCut PC from the official website and begin making product demos that sell!


